Buyer’s Guide and Review for the Best Bunn Coffee Maker in 2021

Bunn has been producing coffee makers since the early 1970s. It is no wonder that when many start to look for a reliable, sturdy, and high-quality coffee maker check the various models Bunn offers.

Over the decades Bunn has launched a vast choice of coffee makers, both for commercial and home use. Wading through the different models, with plenty of different features, is no easy task. 

We did it for you and we want to highlight some of the best Bunn coffee makers, so you don’t have to spend hours researching!


BUNN NHS Velocity Brew

The term “velocity” here isn’t misused. Bunn advertises this model as the fastest, 10 cup coffee maker on the market and the speed is noticeable. It can heat a minimum of 4 cups and up to 10 in just 3 minutes, keeping the coffee warm for a long time. With a sturdy and redesigned carafe, the Bunn NHS Velocity is the family model you need if you want to quickly have your coffee ready.


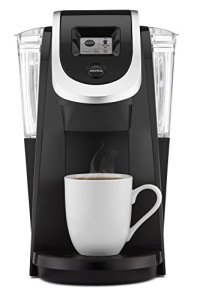
BUNN MCU Single Cup Multi-Use Home Coffee Brewer

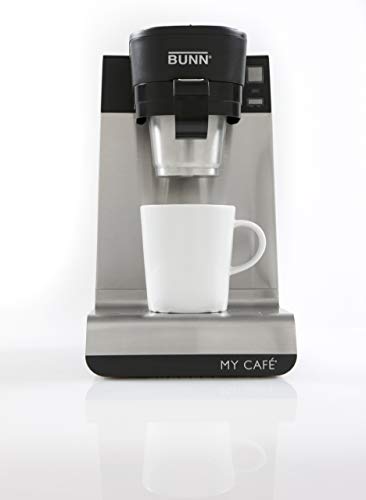
Nearly opposite to the Velocity above, the Bunn MCU Single Cup Multi-use Home Coffee Brewer is a single cup coffee maker, without many bells and whistles. It is small yet efficient, made with good construction, and can be portable. 

It has no reservoir, so you pour the water you need at the moment and exactly that amount will be brewed. This makes it easy to gauge the coffee size, a feature especially useful for a single cup brewer.


BUNN BT Velocity Brew 10-Cup Thermal Carafe

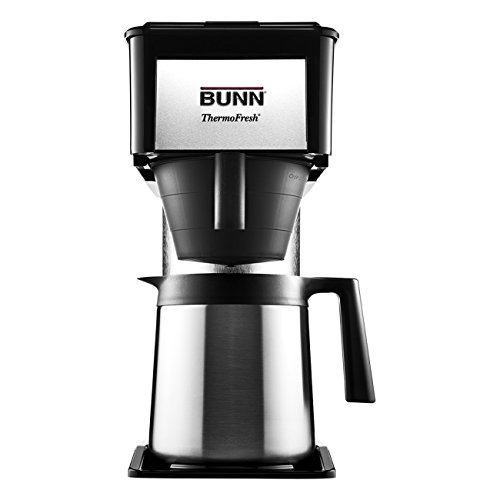
Another 10 cups coffee maker, the Bunn BT Velocity has a wholly insulated carafe to keep the coffee warm for as long as 2 hours without wasting energy. 

It is as fast as you would expect from the name, warming up 10 cups in less than 3 minutes. It is definitely a bulky machine, quite tall, and built to be efficient and durable.


BUNN BX-D Velocity Brew 10-Cup Coffee Brewer

As you can expect by now, the “Velocity” tag in the name means that the coffee maker can heat water as fast as possible, taking less than 3 minutes for 10 cups of hot coffee. The Bunn BX-D Velocity Brew is no exception and offers a sturdy design as well.

This model is particularly special as it is capable of calculating the altitude you’re at and accordingly adjust the temperature of brewing. That’s because at high altitudes there’s less air pressure and water boils at a lower temperature than at sea level. 

The BX-D Velocity is able to help you save some energy by taking into consideration the altitude, and not under-extracting the coffee at the same time. Both important features if you live on a high mountain.


BUNN GRB Velocity Brew 10-Cup Home Coffee Brewer

The GRB Velocity Brew is as fast as any other in the Velocity category but is made to be more affordable. It is a tall and sturdy model that won’t fit in some countertops but otherwise has all the build quality and efficiency that you can expect from a Bunn coffee maker.

If you are looking to save some money and still have a good quality coffee brewer, the GRB Velocity Brew is fast, reliable, and easy to use as any other Bunn model!


BUNN 33200.0015 Best Commercial Model

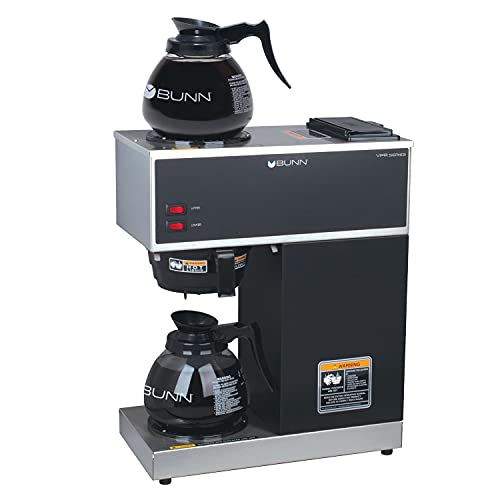
If you have a business or are looking for one of the most performing Bunn coffee makers, look no further than the Bunn 33200.0015. It is a fast and reliable coffee maker, capable of brewing 3.8 gallons of coffee every hour, which is equivalent to a full pot every 3 minutes.Performance without compromises. Of course, it is not the cheapest model nor the most featureful, but its purpose is to be a strong and fast coffee maker for commercial uses and it perfectly hits the mark.


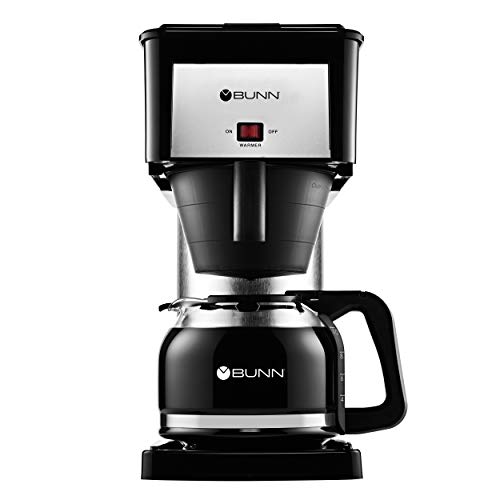
BUNN Speed Brew 10-Cup Home Coffee Brewer

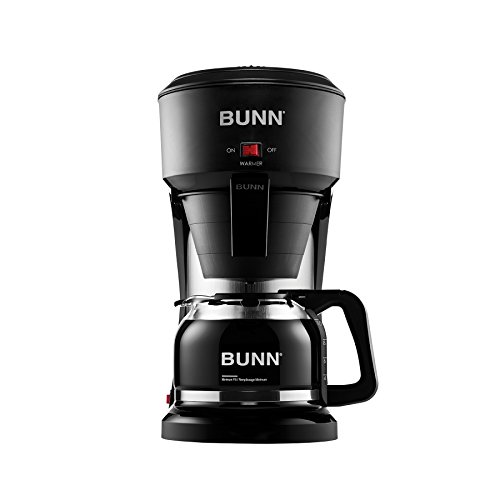
Coffee experts may look at this Bunn Speed Brew model with particular attention. While being fast and reliable as you’d expect from a Bunn coffee maker, this model has a distinct spray head that allows water to be in contact longer with the ground coffee. Longer contact just allows for extracting more flavors from it. 

It is thus a Bunn coffee brewer for those who want a richer, fuller coffee experience. It doesn’t compromise on performance, being able to heat 10 cups in less than 4 minutes, just 1 minute more than most other Bunn models.


Brew Speed

As you have seen, all these coffee makers pride themselves in being able to heat water very quickly. 

Why is it important though? 

First, it is one of the primary qualities in any coffee brewer to be fast: when you want your coffee in the morning one of the worst things is having to wait fifteen minutes for it. A fast coffee maker is thus perfect to serve the desired cup as fast as you need, every time you want it.

Moreover, for families, a fast coffee maker is vital to be able to serve all the members at the same time, and not let anybody wait for their coffee. Which would clearly be not nice (if not rude). 

A capable coffee maker that can heat up multiple cups of water in mere minutes makes the difference between having to wait multiple times for it to brew and a quick, easy, and painless coffee brewing experience.

Brew Capacity

Similarly, the coffee maker’s carafe size is important. If you have a large group of people to serve, you want to be able to accommodate their tastes without having to stop, clean the filter and refill the reservoir, before being able to brew more coffee. 

With many people drinking more than a few cups throughout the day, a large coffee maker is important. Choose the right one for the number of cups you and your family plan to drink every few hours.

Brew Options and Features

Both speed and size are a staple of all the Bunn coffee makers we reviewed today. Only one is a single cup model, intended for single person use, and a moderate coffee consumer too.

A timer to start brewing coffee right when you need it is a feature often present too, as with an alarm to alert you of the completion of the brewing process. Quality materials and a sturdy construction are offered in all the Bunn coffee makers in this article. It is definitely an important feature as to not buy something that can quickly break.

Moreover, Bunn filters for use in their coffee makers are known for their height and quality, and all the Bunn coffee makers are thought to be used in conjunction with these types of filters for optimum coffee quality.

Cost

Thus, when shopping for a good coffee maker, all these features and many more can raise the price, even sharply. For instance, a grinder included in the coffee maker makes sure that you’ll grind coffee beans right before the brewing time, having the freshest cup of coffee possible. 

That is a desirable feature that will influence the cost, as you practically will have two tools, the coffee maker and grinder, in one. Quality of construction, like the materials, is an important factor for having a durable coffee maker but inevitably is going to make it cost much more. Good materials are pricey. 

Many coffee makers today let you choose the coffee strength by tweaking the extraction of the ground coffee. To have exactly the coffee as you wish, you may want to spend more for a model with this feature. 

A pot warmer to keep warm your coffee even hours after brewing can considerably influence the final price. It may be worth considering buying a model with one as a warmer lets you warm your mug before brewing the coffee, an important factor in making you enjoy coffee at its best.

Fancier features like an automatic timer and the possibility for the coffee maker to self-clean are going to raise the costs quite a bit. Consider whether you actually need any of these more advanced features, as most of the difference between models is due to these.

Altitudes

Lastly, a word about high altitude and coffee brewing: we have seen that the Bunn BX-d Velocity Brew is able to adjust the water temperature to compensate for the difference given by the altitude. 

If you did not have a coffee maker with such a feature and were brewing at very high altitudes, you’d end up with a weaker and watery cup of coffee, because the coffee maker would attempt to reach the normal boiling point of water, 100 °C/212 °F, while the water would start boiling much earlier

Once the boiling point is reached, the brewing would start, but it will happen instead at a lower temperature. That will mean that some of the components that make the flavors of coffee won’t end up in the cup, or less of them at least. The coffee will end up under-extracted (what’s commonly called “weak”). Therefore, a coffee maker that can identify the altitude you’re at and tweak the water temperature accordingly is vital to making a good cup of coffee.

Buyers Guide for the Best 4 Cup Coffee Makers in 2021!

4 cup coffee makers are located somewhere between a single cup model and a 6 to 10 cup model. They can brew more coffee than the previous model, but not as much as the most powerful coffee makers on the market.

Unless you are single or the only coffee drinker in your household, you will need a larger coffee maker capable of brewing at least 4 cups of coffee.

A very large maker will be too large and too expensive for your needs. A 10 cup coffee maker is useful for large families or commercial purposes, but the majority of people will only require a 4 cup coffee maker.

They use less energy than larger models while brewing enough coffee for everyone in a single batch. Instead of having to refill a small coffee maker to make a second brew because the first was insufficient. It is also typically smaller than other makers designed for large families, saving you counter space.

We’ve compiled a list of the best 4-5 cup coffee makers on the market for couples, small families, and groups of friends.

Mr. Coffee 4-Cup Switch Coffee Maker

A small, sleek, and light coffee maker with a timer. The Mr. Coffee 4-Cup may be the right 4 cup coffee maker for you if you’re looking for a simple yet efficient brewer.
It has a pause button that allows you to stop the brewing process. The carafe can be washed in the dishwasher, and the maker as a whole is easy to clean. It’s not a workhorse, and it’s not the most feature-rich, but it’s easy to use and cheap. It is ideal for a small family to have coffee in the morning because of the included timer.


Bonavita 5-Cup One-Touch Coffee Maker

Coffee connoisseurs will recognize the Bonavita brand as quality-focused and capable of producing coffee at barista-level levels. It includes a showerhead that improves coffee extraction and pre-infusion, as well as other features designed to produce more flavorful coffee.
It also uses a thermal carafe instead of a pot warmer, which helps to keep the coffee warm without burning it. It’s a little larger than the other 4 cup coffee makers on this list, but the extra kitchen space may be well worth it for a more flavorful cup of coffee.


Cuisinart DCC-450BK 4-Cup Coffeemaker

The Cuisinart DCC-450BK is a four-cup coffee maker with a stainless steel carafe that keeps your coffee warm for an extended period of time. It is intended for those who want a simple and compact coffee brewer.
It has a pause function, which is useful for manual coffee pre-infusion, as well as a 30-minute automatic shut off feature. It is, indeed, a small model that is ideal for portability and small kitchens.


Capresso 303.01 4-Cup Espresso and Cappuccino Machine

The Capresso 303.01 is more than a four-cup coffee maker. With the included milk frother, it can also brew espresso and cappuccino.
This model, like an espresso machine, has a true portafilter and can make anything from a single espresso shot to four cups of black coffee. It is one of the most versatile coffee maker models on the market, as well as one of the most compact and portable, making it an excellent multi-purpose machine.


Zojirushi Zutto 5-Cup Drip Coffeemaker

The Zutto has a 5 cup capacity, making it ideal for those who need more coffee than the standard 4 cup models. It includes a water charcoal-based filter for soft water, which not only reduces limescale buildup in the brewer but also produces better-tasting coffee. Even with the charcoal-based filter, descalement of the coffee maker is still recommended.
It’s small and has an automatic keep-warm function. All of these features come at a price, as the Zojirushi EC-DAC50 Zutto isn’t the most affordable coffee maker on this list.


Mr. Coffee Advanced Brew 5 Cup Programmable Coffee Maker

This slightly larger Mr. Coffee model has a keep-warm function, a 24-hour timer, and a stainless steel carafe!

Definitely a sturdy coffee maker, with an excellent overall build quality! Despite the fact that it does not increase the importance of brewing, its nearly full black color is aesthetically pleasing. This model may be ideal for those who prefer a 5 cup coffee maker to a 4 cup coffee maker.


The Filters

All of these coffee makers have a filter where the coffee is extracted. Most have a flat or conical filter, which provides a slight advantage for better brewing by evenly distributing the coffee.

Water should pass through the ground coffee more uniformly, avoiding issues such as over- or under-extraction of the coffee. The majority of models employ paper filters, while others employ permanent filters made of fine wire mesh.

The latter will save you money because you will not have to purchase as many paper filters, but it will require regular cleaning.

Paper filters generate more waste, but they are the preferred method of brewing drip coffee by experts because they reduce the amount of solid coffee particles that end up in the mug and provide a more gentle yet flavorful taste.

The Carafes

Every coffee maker on this list comes with a carafe made of tempered glass or stainless steel. Because metal absorbs a lot of heat, the latter aids in keeping the coffee warm, but it may result in slightly burnt coffee if consumed after several hours of brewing.

Tempered glass carafes are unaffected by this problem, but they require more energy from the coffee maker to keep the coffee warm for longer periods of time. A pot warmer is commonly used for this purpose.

The Usage and Maintenance

Most 4 cup coffee makers must be cleaned on a regular basis to save energy and waste. Ideally, after each use. Limescale can accumulate over time, and a descaling solution (an acid-based industrial or homemade liquid) must be used to remove limescale buildup from the interiors of the carafe and coffee maker for them to function as well as new.

Any coffee maker is easy to operate. Almost all have no more than two buttons, one for selecting the coffee strength and another for beginning the brewing process. Some models let you pause the brewing process, which is useful if you want a specific amount of coffee.

The Design

Few coffee makers have a distinct design that is both modern and aesthetically pleasing. Given that such machines must be used on a daily basis and must be visible in your kitchen at all times, consider how attractive the model of your choice is.

It is reasonable to choose a model that is appropriate for your needs as well as the environment in which it will be used.

The Features

As the brief reviews of each model show, the majority of them have similar features: a timer, a way to keep the coffee warm for hours, a pause button, a permanent or paper filter, a carafe, and varying degrees of cleaning ease.

Because a self-cleaning unit will save you a lot of time, a timer is useful to have your coffee ready at a specific hour every morning. Consider how much energy these coffee makers require to operate and self-clean, as it could be a significant amount and make a significant difference in the monthly energy bill.

In general, the more energy a model requires, the faster it brews. Aside from these drawbacks, all of these 4 cup coffee makers are dependable, efficient, and modern machines that will serve you well for a long time!

Keurig 2.0 K200 – In-Depth Review 2021

Keurig is a well-known brand that needs no introduction. Since 1992, Keurig, one of the most popular coffee machine manufacturers in the United States and Canada, has sold single-serve coffee machines.

Their K-cups system is popular among coffee drinkers who prefer to have a large amount of coffee available throughout the day with the press of a single button.

The K200 is an excellent entry-level machine for those who are new to the Keurig world. In addition to delicious coffee, it uses K-cups to make hot cocoa, mochas, and tea. Simply insert your preferred K-pod and the Keurig K200 will brew it for you!

The Keurig K200 was created with the goal of being easy to use and intuitive. It maintains the standard “push a button and get your coffee” principle of all Keurig machines while adding a slew of new features to make brewing the perfect cup of coffee even easier.

It is a medium-sized machine that produces enough coffee per day to meet the needs of up to 4-5 people. It is ideal for small to medium-sized households.

The Features

But what exactly distinguishes the K200?

First and foremost, thanks to its touch display, the Keurig K200 requires no technical knowledge to operate. The arrow buttons let you select the size and strength of your coffee, as well as other beverages like hot cocoa or tea.

There isn’t much that needs to be done to get the machine to brew. The display is specifically designed to be easy to read and to provide only the information required to understand what is going on. Basically, no one will be perplexed.

To make things easier, some features you might expect to find in a coffee machine are missing: a clock, a timer, and an automatic power-off. This isn’t a problem if all you want in the morning is a cup of coffee, but it’s limiting if you want to customize it beyond changing the size and strength. To save energy, remember to turn off the machine after each use.

K-cups power the Keurig K200 machine. Without it, you wouldn’t be able to brew anything. It’s understandable to wonder if there will be enough flavors to satisfy your palate and keep you from getting bored as a Keurig proprietary technology.

Don’t be concerned!

K-cups are available in over 400 different flavors and 75 different brands. Finding someone you like should be simple. The K200 accepts all standard K-cups in sizes of 4, 6, 8, and 10 ounces, as well as “k-mug” pods in sizes of 12, 14, and 16 ounces.

On a single refill, the Keurig K200 can brew up to 4 cups of coffee. Because of its large 40-ounce water reservoir, you won’t have to refill it as frequently. The water reservoir is removable and washable.

The filter is located inside the machine and should be changed every two months or so, depending on how frequently you use it. There’s a dial you can turn to set the month the filter needs to be replaced, just in case you forget. Set it as soon as the new one is installed, and you’ll never forget when it’s time to get rid of it.

But what about the coffee’s own strength?

The Keurig K200 has you covered as well! To make the perfect cup of coffee, the machine has not one, but nine different modes to choose from. Depending on the size of the K-cups you’re using, the machine will provide the appropriate brewing time and extraction to match the quantity of ground coffee in the pod.

If that isn’t enough, there’s always the strong brew mode, which increases extraction while maintaining the same cup size. If you need a caffeine boost in the morning, this mode is a must-have.

For those who prefer very large coffee cups and mugs, the Keurig K200 can be outfitted with an optional carafe that holds up to 22, 26, or 30 ounces of coffee. You’ll need to add the carafe and use Keurig k-carafe coffee pods for these sizes.

Those pods contain more ground coffee, allowing you to brew a large mug of the dark liquid. The same strong brew mode found in smaller pods can be used in these larger ones, resulting in a large number of strong coffee servings.

Pros and Cons

Overall, the Keurig K200 is a great machine for newcomers. Its benefits include a low price, a large selection of K-cups in various flavors, and the ability to brew alternative drinks such as hot cocoa and tea.

It is much more than a coffee machine.

It brews coffee quickly, taking about 1 minute from the time you press the brew button to completion, and it has a large enough water reservoir to meet most needs. If a single cup isn’t enough, the optional carafe lets you make truly supersized coffee with the convenience of a single cup.

Not to mention, the strong brew mode is specifically designed for those who rely on caffeine to function at work or are concerned that Keurig machines cannot produce an intense cup of coffee.

Of course, the K200 isn’t without flaws. It does not allow you to customize your coffee beyond size and strength, so if you want more creative freedom, look into more advanced models. Check out the other Keurig 2.0 models!

It is not intended to make large cups of coffee or to brew for the entire family with a single button press, as this would necessitate the purchase of the optional carafe. Because they are not recyclable, K-cups are not exactly eco-friendly.

Brewing coffee with them every day means that hundreds of pods end up in a landfill each year, which is not good for the environment.

If you can live with these drawbacks and limitations, the Keurig K200 is an excellent entry-level machine that will delight you and your family for many months!

There are numerous alternatives in the same price range as the K200, but this model is still recommended due to its durability, ease of use, versatility, and large selection of coffee flavors that can be used with it.

Keurig K200

Why Is Your Keurig Not Brewing? And How to Repair It!

Any Keurig machine owner will, sooner or later, encounter the unpleasant experience of not being able to brew. The problem could be caused by a number of factors, the majority of which are minor and do not require the assistance of a technician.

Let’s take a look at the most common causes of your “Keurig won’t brew” problem.

Check Parts

The simplest thing to look for is misassembly, but it is not the first thing that comes to mind. It is possible that the Keurig machine will not brew because some parts are missing or are not connected. Keurig brewers are programmed not to brew unless they are fully charged.

To begin, ensure that you have not enabled the auto shut-off feature, as the machine may have been turned off. If this is the case, unplug it from the wall outlet and double-check that the water reservoir is properly installed.

It has a magnet that could become misplaced. If the magnet and reservoir are both properly positioned, the problem must be elsewhere.

Trapped Coffee Grounds

Another quick fix for the Keurig won’t brew problem is to use the “spanking” or “burping” technique to remove any accumulated coffee grounds inside the machine. Begin by emptying the water reservoir and drip tray.

Then, turn the machine upside down on a cleanable surface, such as a sink, and spank it several times. This should clear out any leftover water or coffee grounds that may have become trapped inside the Keurig and prevented it from brewing.

Clogged Needle

The Keurig machine may have a clogged needle and will not brew. The needle must puncture the foil lid of the K-cup, but it will not do so if it becomes clogged with coffee grounds or minerals from the water.

As a result, the Keuring will be unable to brew.

It’s time to use a vinegar-and-hot-water solution to clean all internal filters! Then, wash them with water and soap, and run several cycles with just water to thoroughly clean them. If this is not possible and the Keurig still does not brew, proceed to the next possible solution.

Utilize A Paperclip

Take out a paperclip. Remove the plastic holder that is currently holding the K-cup in the brewer. Then, using the paperclip, remove any remaining remnants from the inside. Make use of water to help with the cleaning process.

Also, try removing the handle lid. Water is injected into the K-cup via a series of tubes. Clean them all with the paperclip as well. After you’ve completed these tasks, try running a few cycles with only water. If this isn’t possible and the Keurig still won’t brew, proceed to the next possible cause.

Electrical Issues

If the Keurig machine is completely clean and there is nothing stuck inside, the problem could be electrical. If the display is blank or does not show the expected content, unplug the Keurig for a few minutes and then reconnect it. If that solves the problem, it was caused by an electrical malfunction. Otherwise, the cause of the Keurig not brewing issue could be mechanical.

Clogged Water Reservoir

Another option for resolving the problem is to clean the clogged bottom of the water reservoir. If you’ve had the machine for a long time, especially if you haven’t cleaned it on a regular basis, debris may have accumulated at the bottom of the reservoir. This buildup of debris may be clogging the machine and preventing it from brewing.

To clean the metal mesh inside the reservoir, use warm water and soap. Put it back in when it’s dry, and the Keurig should start brewing again.

If the Keurig continues to fail to brew, debris in the water valves could be the cause. Limescale, in particular, may have accumulated and not been removed by the most recent descaling, if it was performed.

The solution would be to descal the Keurig machine again and allow it to completely cool down before attempting to brew with it again. If neither descaling nor rebooting resolved the issue, a few other solutions may be tried.

Water Pumping

The Keurig may not be brewing if the machine was overfilled or the wrong pods were used. Another possibility is that the needle has become clogged with debris.

Clear the drip tray. Once you’re certain that the reservoir contains the exact amount of water recommended, place a cup beneath the dispenser and attempt to brew. This should eliminate any leakage that was causing the Keurig not to brew.

Using soft water, on the other hand, may cause the Keurig machine to stop brewing. Keurig advises against using overly soft water. Especially if you just discovered coffee grounds in your cup. That could indicate that the water was too soft for the machine.

Try emptying the water reservoir completely and refilling it with either tap or bottled water. Run several cycles without a K-cup to see if the Keurig finally begins to brew.

Reset

Before contacting a professional technician, the last resort is to reset the machine. Older Keurig models did not have a proper reset button. Turn off the machine, empty and remove the water reservoir, and leave it unplugged for several hours to reset it.

When turned on, the machine should have returned to its original state, hopefully resolving the Keurig won’t brew problem.

On newer machines, a hard reset option is available. Press and release both the small and medium mug buttons at the same time. Immediately after that, press the menu button three times. The time should be 6:09 on the display.

The clock will be reset to 0:00 if you press the menu button again. Keep your finger on the medium mug button. Hold down the menu button for one second.

While still holding the medium mug button, press and hold the small mug, then simultaneously release both. That should have completed the hard reset of the Keurig machine.

Conclusion

Finally, you should be able to brew again with your Keurig!

Take good care of it to avoid most of the issues that cause brewing to stop in the future. Regularly descale the machine, preferably every 2-3 months.

Use only water that is not too soft. There are strips that will tell you how hard it is, and if it is extremely soft, use a different source or bottled water.

Thoroughly clean all removable parts on a regular basis. Many of the fixes in this article, as we’ve seen, necessitated a thorough cleaning of the machine. If you take good care of every component of the Keurig, you won’t have to clean it thoroughly after it’s finished brewing.

Flush the machine by running several cycles without any pods, allowing hot water to clean it for you. There will almost certainly be a lot of cycles with dirty water. Turn them off only when the water coming out is as pure as the water in the reservoir.

Your Keurig machine will not stop brewing anytime soon if you follow these simple maintenance procedures, and it will last you a long time! You will not need to pay for a technician if the machine has been properly maintained since its purchase. In the worst-case scenario, one of the fixes discussed in this article will most likely restore the Keurig’s brewing capability.

What is the cleverness of the Clever Coffee Dripper? In Depth Review

You’ve probably got a few questions after reading the title:

Why is the word “clever” used?

Why would a coffee dripper be called clever?

Is it powered by artificial intelligence?

Pros and Cons

All of the pertinent questions. The Clever Coffee Dripper appears to be identical to any other Melitta plastic filter cone dripper. The appearance is neither distinctive nor particularly novel.

The cleverness comes from the addition of a special valve at the bottom that prevents water from flowing. When the dripper is placed over a cup to brew, the valve opens and the coffee flows out.

This significantly improves extraction. Another advantage of this solution is that the brew time can be easily controlled. You can easily steep it for another half or full minute if you want a stronger coffee, for example. You can’t do it with a standard dripper that doesn’t have a valve.

You’d have to add more ground coffee on top of the already extracted coffee grounds, which would over-extract the coffee and make your cup bitter. Alternatively, pour less water, which results in less coffee. The Clever Coffee Dripper simply increases the extraction time without requiring any additional intervention.

Second, the Clever Coffee Dripper does away with the need for an expensive gooseneck kettle. Water does not need to be poured over in a precise manner, with complicated rotations and close attention. You can add the entire amount of water at once. You can use any kettle you have on hand for the job.

Filters are not required to be a specific shape or consistency. Different filters will, of course, make a difference, but using one over another is not required. The time spent immersed will help to balance out the variables.

Paper filters from the supermarket will work perfectly in the Clever Coffee Dripper.

Clever Coffee Dripper

Things to consider before buying

The steeping time and coffee-to-water ratio are the only two variables to consider. This is true for any coffee dripper. The Clever does not make an exception in this case and, as usual, gives you complete control over both.

The disadvantage of the Clever Coffee Dripper is that it functions more like an immersion brewing method than a true pour over method. In a proper pour over, the ground coffee is only in contact with the water for a short period of time. All that is required is for hot water to flow through the coffee.

The Clever dripper allows coffee to stay in contact with water for as little as a pour-over or for much longer. It all depends on when the bottom valve is turned on. As a result, the immersion can last longer, much like a French press, which is a full immersion method.

This has an effect on the finished product. It prefers a full-bodied cup with a heavier mouthfeel than a traditional dripper like the Hario V60.

The Clever Coffee Dripper is a cross between it and a French Press, which has a much fuller body and is preferred by those who prefer a stronger coffee. It’s not a significant difference, but it’s something to consider before purchasing the Clever Coffee Dripper.

The Clever is also entirely made of plastic, which is not the most long-lasting material. It won’t break if it falls, but it won’t last a decade either. It stains more easily and is more difficult to clean than glass. It has no effect on the taste of your brew; it is purely cosmetic.

Who is likely to buy it?

So, who is the Clever Coffee Dripper really for?

The Clever brewer, which is designed for small-to-medium amounts of coffee, will benefit people who drink no more than 1-3 cups of coffee per day. Those who don’t have the time or patience to learn how to brew with a traditional pour over will appreciate the Clever! Making a good cup of coffee does not require precise water-pouring movements or super-precise measurements.

Those who like to take their coffee equipment with them on the road will appreciate the Clever Coffee Dripper. It’s small, made of plastic, and extremely lightweight. Smaller than an Aeropress or French Press, but more delicate than a V60 or Chemex. It’s best to keep it in a small bag and set it aside until you’re ready to use it at your destination.

The low cost of this dripper is also an important factor to consider. At this price range of $20-30, it’s difficult to beat.

Comparisons

However, there are a few things to think about before purchasing the Clever Coffee Dripper. If you need coffee for a large group, this will simply not suffice. A large French Press or Chemex will yield more coffee in a single brew than the Clever, but at a higher cost.

The Clever Coffee Dripper is not for you if you like bubbly coffee with a layer of crema on top. An Aeropress or a better small, manual espresso machine will produce a coffee that tastes more like what you’re looking for.

The Aeropress is ideal if you also need portability.

The Clever will come close but not quite to satisfying those who prefer full-bodied coffee. Because it is a brewing method in between a pour over and a French press, the coffee it produces will have characteristics of both but will not be identical to either.

The body will be fuller than a pour-over, but not as full as a French Press. For a heavier body, a small French Press will suffice while remaining portable.

The two most noticeable differences between popular brewing methods such as the Aeropress and the French Press are the body and crema. The former is easier to transport and nearly impossible to break, but the Clever is more user-friendly and produces slightly more coffee with a single brew. The French Press coffee has more body, a larger capacity, and is more visually appealing. The Clever will make cleaner coffee for fewer people at a time.

Finally, the Clever Coffee Dripper produces a slightly fuller, less clean-tasting coffee than a traditional pour-over. The Clever will have an advantage in terms of ease of use and cost, as many pour-overs are twice as expensive or more than the Clever. They will allow you to experiment with the brewing process in order to get the best coffee for the beans you’re using, but at the cost of more knowledge, testing, and time on your part.

Conclusion

Overall, the Clever Coffee Dripper is an easy-to-use, low-cost, and dependable coffee brewer. It’s a great option for small amounts of coffee with a clean, medium body. A simple tool for brewing coffee for you and your partner without the fuss and attention required by other methods.

Hamilton Beach Flexbrew Coffee Maker Review – A Fantastic Two-in-One Machine

You don’t often hear the word “flexibility” when it comes to coffee. The majority of brewing tools are designed to perform a single task. Unless we’re talking about high-end machines, they rarely allow you to make a variety of coffee drinks.

The coffee world isn’t exactly friendly to the concept of adaptability.

Hamilton Beach’s FlexBrew is an exception. It’s adaptable because it doesn’t force you to use a specific method of brewing, but rather gives you two options.

In the same machine, you can get both filtered drip coffee and single-serve pods.

This opens up a whole new world of opportunities for you. The Hamilton Beach FlexBrew makes use of single-serve K-cup pods, which are ideal for brewing for just you or a couple. Switching to brew with the filter allows you to make up to 12 cups of coffee when you need a larger quantity of coffee or have guests over.

Adaptability, indeed!

Because each brewing method has its own reservoir of water, they are completely separate and operate independently of one another.

Features

When you buy the Hamilton Beach FlexBrew, you’re actually getting two machines in one. With the option of using the filter or the pods at any time. This gives you more flexibility not only in terms of cup size, but also in terms of the coffee you can brew.

Hundreds of official and compatible K-cups are available. The Hamilton Beach FlexBrew is a machine that can use nearly every type of coffee on the market, as it can use ground coffee from any supermarket.

Brewing with Pods

But how does the Hamilton Beach FlexBrew actually work? Let’s begin with the pods that are currently being prepared.

You are not required to use one of the two systems to brew a specific cup size by the brewer. You are free to use either option. Keeping this in mind, K-cups are intended to be used for a single cup of coffee rather than large mugs. As a result, the pods system is best suited to a single cup and a single person.

You’d use the machine’s filter drip coffee setting for larger amounts. Brewing with a K-cup pod is as simple as pressing the single-serve button, lifting the lid, inserting a pod, and closing the lid.

In about 1-2 minutes, your coffee will be ready.

The main advantage of pod-based systems is convenience. Making a good cup of coffee takes little time and requires no special skills.

How to Use a Coffee Maker to Brew Coffee

Brewing with the filter system is a little trickier, but not impossible. Fill the netting with a paper filter and your favorite ground coffee, possibly just ground for the best aroma and taste.

Fill the reservoir with coffee to the desired level. Press the brew strength button to make a stronger cup of coffee. Otherwise, simply press the brew now button and wait for the Hamilton Beach FlexBrew to do its thing.

A 24-hour timer can be used in conjunction with the filter system to ensure that you have freshly brewed coffee whenever you want. To avoid wasting paper, the FlexBrew also supports reusable filters.

Also, keep in mind that the carafe that comes with the machine is not thermal and instead relies on a heating plate beneath it to keep your coffee warm. It may overcook if you leave the carafe on it for an extended period of time.

Pour the coffee into your mug and accept that it will not stay warm for several hours.

Unfortunately, there is no way to keep the coffee warm when using the single-serve pods system. That shouldn’t be an issue because the brewing system is designed for smaller cup sizes, so you won’t have to wait too long to drink.

Quality of design and construction

A proper Hamilton Beach FlexBrew review would be incomplete if the machine’s actual build quality and design were not mentioned. The machine is relatively small, which is a plus. This is especially surprising in light of the dual brewing system and water reservoir.

It is approximately 13 inches tall and 11 inches wide. It will almost always fit in the same space as a standard small kitchen appliance. The Hamilton Beach FlexBrew’s majority of components are easily removed.

The carafe, drip tray, K-cup brewing pieces, and water reservoirs are all removable. These pieces can be removed and thoroughly cleaned if necessary. All of the pieces can also be washed in the dishwasher.

The Hamilton Beach FlexBrew is primarily constructed of hard plastic. Given the price at which it is being sold, this should come as no surprise.

Pros and Cons

You may be wondering why you would prefer a Hamilton Beach FlexBrew or single-serve system to a filter system. We’ve already discussed the machine’s advantages; now let’s take a look at its disadvantages.

The two brewing systems can operate independently of one another because they have separate water reservoirs. If one fails, the other will keep working. However, it is also a disadvantage because you must now descale two systems instead of just one.

As a result, maintenance time must be increased. After all, the Hamilton Beach FlexBrew is a two-in-one machine, so it stands to reason that it would necessitate more maintenance. Both reservoirs are easy to refill.

However, it is easy to brew for an extended period of time using only one system and forget that mold or even calcification has formed in the less used reservoir.

The pod side of the Hamilton Beach FlexBrew has an unexpected shortcoming in that it can only brew enough for one cup at a time. Other Keurig machines have larger reservoirs and can brew as much water as you put into them.

The Hamilton Beach FlexBrew, on the other hand, requires you to switch to the filter coffee system if you need a more flexible and larger amount of coffee.

Most people won’t notice, but it’s something to be aware of.

Having two machines in one means that two machines can potentially fail, just as having two machines in one means that two machines can potentially fail. While one machine can be used while the other is offline, having two brewing systems means you have twice the chance of something breaking down.

Hamilton Beach Flexbrew

Instructions for Cleaning

To avoid failures, keep your Hamilton Beach FlexBrew as clean as possible. Regular maintenance will ensure that it is always operating at peak performance.

If you have hard water, descaling should be done every few months, or more frequently. Professional descaling solutions are available, but a simple mixture of white vinegar and warm water works just as well. 1 tablespoon vinegar and 2 tablespoons water

This solution is applicable to both the carafe and single serve pod sides. Brew this descaling solution repeatedly until it has all passed through the machine, in both reservoirs.

As a result, the entire procedure must be carried out twice. Then, run clean, warm water through both reservoirs to flush out any remaining vinegar or descaling solution in the machine.

Don’t forget to clean all of the Hamilton Beach FlexBrew’s detachable parts on a regular basis with hot water or in the dishwasher. It’s best to do it once a month or so.

This includes the carafe, drip tray, K-cup brewing pieces, and both reservoirs. Make sure there are no soap residues on the machine before reassembling it.

Pod Coffee Makers vs Traditional Coffee Makers

Some may wonder why a double brewing system in a machine is necessary at this point. If you primarily brew filtered coffee, you will require twice the maintenance and risk of failure.

That makes perfect sense.

The system of single-serving K-cups isn’t for everyone. If you primarily brew large mugs of coffee, want it to stay warm for a few hours, and prefer to save money by buying coffee beans yourself, pre-ground or not, the Hamilton Beach FlexBrew is more than adequate. Instead, a basic drip coffee maker will suffice.

If you prefer to brew smaller cups of coffee without having to worry about grinding your coffee, this method is for you. If you don’t want to worry about buying filters or calculating how much ground coffee you need to brew a coffee that exactly matches your tastes, a pod system machine is a good option.

You will enjoy extreme convenience and ease of upkeep (there is no carafe or drip tray to clean). Because your coffee will taste the same every time, you will have consistency.

It is impossible to brew coffee “wrong” with a pod system machine. Every time you brew with the same type of K-cups, you’ll get the same flavor.

The Hamilton Beach FlexBrew is ideal for those looking for a simple way to brew smaller amounts of coffee without having to give up their favorite ground coffee.

For a very low price, you’ll be able to brew with two systems. The FlexBrew ensures efficiency and versatility while producing consistently delicious coffee.

AeroPress Go Review – A More Convenient Way to Brew While Traveling

The Aeropress has quickly become a household staple for many home coffee brewers since its introduction 15 years ago. Not only at home, but also in a few bars, coffee brewed with this small device is now available.

Many coffee experts recommend it as a viable alternative to the traditional french press, Moka pot, and pour overs.

It’s cheap, small, and convenient, and it makes great coffee.

Few people are aware that the Aeropress has a younger brother, the Aeropress Go. What is it exactly, and how does it differ from the older, more common model?

The Design

The Aeropress Go appears to be more black and red than gray and gold. It is nearly spherical in shape, as opposed to the hexagonal design of the original model.

Overall, the Aeropress Go appears to be more stylish and sleek. It’s not a big deal, and most coffee drinkers will probably ignore it, but it’s worth noting.

The Aeropress Go is mostly made of plastic and is about the same size as the original model. Some, on the other hand, are of a different shape and size.

The main body of the new model is made of a plunger with a chamber. The filter cap and holder are included with both Aeropress models.

The Accessories

In the Go version, the holder is much smaller. It can hold up to 20 filters, as opposed to 350 in the larger model.

The Aeropress Go includes a stirrer, a scoop, 350 filters, and a lid to protect the plastic mug. In the first version, you don’t have a plastic cup to pour your coffee into. The Aeropress Go, on the other hand, includes one that can also be used as a drinking cup.

How to Use

The Aeropress Go, like its predecessor, is a quick and easy way to make coffee. It is used in the same way that a larger Aeropress is used. The following is the primary method for brewing with it:

  • Insert a filter into the filter cap.
  • Twist the filter cap tightly into the chamber.
  • Place the chamber on the mug and fill it with about one scoop of fine ground coffee.
  • Shake the coffee a little to level it.
  • Fill the chamber to Level 1 with water. The recommended temperature is 175 °F (80 °C).
  • If you want to make a cold brew, use room temperature water instead.
  • 10 seconds of stirring (more for a cold brew)
  • Insert the plunger and press gently, pausing each time you feel resistance, until it reaches the grounds.
  • Remove the filter cap and push the plunger out to get rid of the used coffee.
  • Rinse the ingredients.

There are numerous other techniques that can be used, but this is the most basic one to get you started with your Aeropress Go.

AeroPress Go Portable Travel Coffee Press

The Size

The smaller size of the new device limits the techniques that can be used. The Aeropress Go is meant to be a portable version of the main one, which is already fairly portable.

Because it is smaller and lighter, the Aeropress Go is even easier to use. The main practical difference, with a volume about 20% smaller than the original model, is a capacity limitation. Some brewing techniques that were successful with the Aeropress are more difficult or impossible to replicate with the Aeropress Go.

There is less space inside for water and coffee because it is smaller. This makes it difficult to accurately invert the device, which is required by some brewing techniques.

Simply put, the Aeropress Go is too small to be turned upside down without affecting the final flavor of the coffee.

Aeropress Go Cup

This change will have no effect on the majority of non-experts. More importantly, as previously stated, the Aeropress Go comes with an integrated cup in which you can both brew and drink your coffee. This differs from the previous model, which required you to brew in your own cup.

As a result, it’s an excellent coffee brewing device for on-the-go. It is resistant to the knocks that it will inevitably take while sitting in your travel bag because it is mostly made of plastic.

Another disadvantage of the smaller size of the Aeropress Go is that it will not fit as easily on wide cups as the original. Some of the larger cups will be difficult to brew with, but using the embedded cup solves this issue.

You can always pour from the included cup into your favorite mug after brewing. If you prefer to drink your coffee in a particular vessel.

Aeropress Go vs Aeropress Original

These are the main differences between the two Aeropress models. From a practical standpoint, not much has changed in the Aeropress Go to make it worthwhile for those who already own a full-sized Aeropress to purchase it.

It is arguably more visually appealing. It is more compact and lighter, but other than that, there hasn’t been much change. If you travel frequently and find that the Aeropress’s already small size bothers you, the Aeropress Go could be the answer.

AeroPress Coffee and Espresso Maker

Even if you already have the original Aeropress, the Aeropress Go is a great addition to your coffee brewing equipment for those who are frequently away from home.

The embedded coffee cup, in particular, can be useful when traveling because it eliminates the need to bring a separate, and often fragile, ceramic or glass cup.

That is, ultimately, the primary advantage of the Aeropress Go over its predecessor. There are no other significant differences between the Go and the Aeropress that would justify purchasing the Go if you already own the Aeropress. The first model excels at many tasks, and the Go does not improve on them.

Who Is It For? 

The smaller size of the Aeropress Go may be a significant disadvantage for some coffee enthusiasts. It’s less adaptable in terms of how you can brew your coffee, which limits the tinkering with the right technique that geeks typically enjoy.

If you’re constantly trying to improve your brewing skills and find the “perfect” cup of coffee, the Aeropress allows you to experiment more freely. The Aeropress Go is simply a smaller and more portable version of it.

If you travel frequently, especially on the road and not in the comfort of a hotel room, the Aeropress Go has an advantage over the Aeropress.

Because it is smaller, lighter, and sleeker, has an embedded cup, and performs just as well as the larger model, the Aeropress Go is ideal for travel and may be a good model to purchase for those new to the Aeropress brewing system.

If you primarily brew at home and only travel on occasion, the original Aeropress will keep you happy and satisfied with its coffee brewing capabilities for a long time.

How To Clean Your Favorite Coffee Maker

Cleaning your coffee equipment is probably the least enjoyable and most frequently postponed of all the coffee-related activities. Most people don’t think about cleaning their coffee makers until a sour, over-burned flavor infiltrates their coffee and makes it taste bad.

Cleaning isn’t glamorous, but it’s necessary. Mold can grow in moist areas, such as your coffee maker’s water reservoir, or in coffee brewers that have not been thoroughly dried. Running hot water through it, as you would when brewing, is insufficient to keep this nasty stuff from polluting the environment in which your coffee is brewed.

In addition, old brews will leave traces inside any coffee maker over time, which can affect the final taste of the coffee. And I don’t mean that in a good way. Cleaning your tools is critical if you want to always have the best coffee you can brew using your preferred method. But how often? And in what way?

Obviously, not all coffee makers are the same, and not all must be cleaned in the same manner. The way the coffee flows through it and the location of the water in it influence how and how often that specific coffee maker needs to be cleaned. Let’s start with how frequently you should clean your coffee equipment, and then we’ll go over how to clean each of the most common coffee makers.

When should you clean your coffee maker?

Every day, ideally. However, not every part of your coffee maker needs to be cleaned on a regular basis. Some only need to be cleaned once a month or so. Let’s take a look at what needs to be cleaned on a daily basis and after each use.

After each use, all removable parts, such as the lid, metal filter, and carafe where coffee is brewed, should be rinsed with water. It is preferable to clean with dish soap and thoroughly rinse afterwards. Ensure that no traces of soap remain in any part of your coffee maker: not only will it be harmful to your health, but it will also cause your coffee to taste strange.

Some of these removable parts are dishwasher safe. Check the instructions for your coffee maker to see which are and which aren’t. A moderately hot dishwasher cycle will suffice to clean these parts.

Cleaning non-removable parts will be more difficult. Cleaning the inside of a coffee maker, the internal tubes through which the coffee runs, or a non-removable water reservoir will be much more difficult. Fortunately, they don’t have to be cleaned every day; once a month will suffice.

If possible, flush out the coffee residues by running hot water through your coffee maker after a few brews, and once a month consider a more thorough cleaning. Disassemble the coffee maker as much as possible and clean it with gentle soap and water, scrubbing where necessary. Commercial soaps can be substituted with vinegar, lemon juice, and salt.

On a regular basis, check the water reservoir or any other parts of your coffee maker that may have had water in them for an extended period of time. These are the areas where mold can grow, and at the very least, flushing out all of the water and allowing the humidity to naturally dry will keep mold at bay.

Use soap water to clean these parts once a month, as soap can prevent mold for longer than hot water alone.

Cleaning should be done on a regular basis for all coffee makers.

As previously stated, each coffee maker requires a different cleaning method and routine. Let’s take a closer look at some of the most common coffee makers and how to clean them.

Drip Coffee Maker

A drip coffee maker is a complicated machine with many moving parts. Cleaning it is a difficult task in general. It entails a number of steps.

First, make sure all grounds, dust, and other debris have been removed from the drip coffee maker. In the tightest spaces, use a damp cloth or a small brush if possible. Once the solids have been removed from the machine, start the cleaning cycle.

Fill the water tank halfway with vinegar and half with water, and use a paper filter to catch any remaining solids from your previous manual cleaning. Half of the vinegar/water solution should be brewed. Allow it to sit for about 30 minutes in the coffee maker. After that, finish brewing everything. Remove the paper filter and restart the brewing cycle with fresh water.

These are the essentials. You won’t need anything else, but you might want to scrub the carafe with a cloth every now and then to remove any markings or coffee residues. However, anything that could scratch it should be avoided.

Follow the instructions in your drip coffee maker’s manual to perform a full descaling of the machine on a regular basis to avoid limescale or calcium deposits.

Pour over

The pour over coffee maker is much easier to clean than a drip coffee maker, with one exception: the bottom half is inaccessible. It won’t need to be cleaned more than twice a month, but make sure to thoroughly rinse it after each use.

Follow these steps to clean your pour over: Fill the bottom half of the container halfway with room temperature water, then top it off with a handful of ice cubes or crushed ice. Combine four teaspoons of salt, one teaspoon of water, and one teaspoon of lemon juice in a mixing bowl.

Swirl the mixture around to coat the entire surface of your pour over coffee maker. The ice and salt will be sufficiently abrasive to remove the majority of the dirt without scratching the glass.

Pour everything down the drain and rinse with cold water once it’s clean. If you use hot water, the temperature difference with the salty iced water may cause the pour over glass to break. If any dirt remains, you can either repeat the procedure or manually scrub it away with a soft brush and a little dish soap.

Cold Brewer 

Cold brew coffee makers are typically pitchers equipped with a filter basket that holds the coffee grounds. As a result, they should be easy to disassemble and clean on their own. Remove as many parts of the main body as possible and clean each one separately with dish soap and a gentle scrub. Check that all of the parts have completely dried before reassembling.

This should ideally be done after each batch, but it can be done once a month if necessary. It is enough to rinse the filter once a day, and if it appears to be dirtier than usual, use a brush with soap as well.

French Press

The French Press is a jumble of parts that, thankfully, can be disassembled easily. To start cleaning a french press, remove the plunger and fill it with warm water. To absorb the majority of the coffee grounds, simply swirl it. The water should then be strained through a mesh strainer in the sink.

To remove oils and stains, scrub the interior of the French press with a brush or a cloth soaked in dish soap. Rinse the entire French press, plunger and all, thoroughly before using it again.

It would obviously be preferable if the French press could be cleaned in this manner after each use. For the time being, a daily rinsing with hot water will suffice, with the larger cleaning reserved for once every two weeks.

Aero Press

The Aero Press is very easy to clean. Simply rinsing the plunger’s main body and wiping away the rubber seal is all that is required. If you believe the interior needs to be cleaned further, rub any remaining residue with a damp cloth and dish soap. You can also simply toss the Aero Press in the dishwasher because it is dishwasher safe.

However, after each use, make sure to clean this tiny coffee maker. Aside from that, it’s a very simple coffee tool to keep up with.

Percolator 

Regularly rinsing any percolator coffee maker with warm water should be enough to keep it healthy and operational for many years. However, you should give it a thorough cleaning every now and then.

To begin, fill the percolator halfway with water. Add three tablespoons baking soda and stir to combine. Turn it on and wait for it to complete the brewing cycle. After the water has naturally cooled, scrub the inside of the percolator with a brush. Take the water out and thoroughly rinse it. Then, repeat with half water and half vinegar. Allow to dry after scrubbing and rinsing.

Once a month, this double brewing cycle will suffice to keep the percolator coffee maker in good working order.

Signs that your coffee maker needs to be cleaned

You may have noticed that there is no universal rule for how often a coffee maker should be cleaned. Everything depends on how often you use it, how much coffee you brew, what kind of water and coffee grounds you use, and so on. More important than sticking to a strict schedule is learning to recognize the signs that your coffee maker needs to be cleaned.

The first sign is if your coffee tastes off. That is a clear indication of the presence of elements that should not be present in coffee.

If the coffee maker takes longer to brew or is louder than usual, it could be due to solid residues accumulating inside it, making brewing more difficult for the machine. Similarly, if the coffee maker does not brew at all or spills coffee, this is an urgent sign that it is dirty on the inside and may be breaking up. Clean it as soon as possible.

Of course, this is only applicable to non-manual coffee makers. In the case of an Aero Press or a pour over, you may want to pay close attention to both the taste and the visual state of the coffee inside. If it isn’t exactly as you bought it, clean it right away.

Pro Tips

Use the dishwasher whenever possible. Many parts of a coffee maker are dishwasher safe; use this to your advantage by saving time and energy with a good dishwasher cycle.

Make a mental note of how your coffee tastes. It is the first and most obvious indication that your coffee maker requires cleaning. Also, if you can test the water you’re brewing with to see if it’s hard or very hard. That means you’ll have to keep an eye out for limescale or calcium buildup inside the coffee maker. Make a large batch of vinegar or professional descaling mixtures to be used for frequent descaling of your machine. In the worst-case scenario, descaling may be required up to once a month.

Those with access to soft water may require descaling once or twice a year.

Make it a habit to disassemble and clean your coffee maker at least once a month. While it may appear to be superfluous, it will undoubtedly prevent the machine from breaking down sooner than it would otherwise.

Full Review of the Top 7 Breville Espresso Machines for 2021

The espresso machine market has long been dominated by Italian companies. Given that the espresso was invented and flourished in Italy around a century ago, this makes sense. Many of the most popular names for espresso machines are Italian or sound Italian.

This is not to say that only Italians can make good espresso machines. Competitors have sprung up all over the world, with some challenging the Italian classic espresso machine manufacturers. One of them is Breville.

Breville was founded in Australia in 1932 and initially produced general home appliances such as radios and sandwich toasters before entering the espresso machine market in the early 2000s.

They have continued to improve their machines since then, earning the respect of coffee experts when it comes to good home espresso machines.

The impressive espresso machine lineup demonstrates Breville’s commitment to innovation. All are easy to use and of high quality construction.

We’ll look at their espresso machine line in this article. Examining each one’s characteristics and qualities to determine which one is best for you.

A summary of each is provided below.

Breville Espresso Machines Review

I’d like to say a few words before we begin the reviews. Breville provides a one-year warranty on all of these espresso machines. Breville’s customer service is well-known for giving each customer personalized attention, with representatives available every day to answer any questions you may have.

These espresso machines are all designed with the user in mind, so even if you have no prior experience, you can start brewing in no time.

Most, but not all, Breville espresso machines use PID (Proportional-Integral-Derivative) control. It regulates the extraction temperature to reduce fluctuations.

Maintaining a consistent temperature is critical for consistently producing good espresso. Any temperature changes will result in a mix of over- and under-extracted grounds.

Something you definitely don’t want to taste in your coffee.

In addition, Breville machines use up to 19-22 grams of ground coffee per brew, which is more than a third more than the average espresso machine. More coffee grounds = richer, fuller-bodied espressos.

Of course, you can use less, but it’s nice to know that you can push the portafilters to their maximum capacity if you prefer.

Breville also places a premium on machine durability. The majority of them are not only made of stainless steel on the outside, but many of the internal components are as well. As a result, any parts of these espresso machines are unlikely to break soon after the first use.

They will undoubtedly last you many years and thousands of espressos before they break. Additionally, the single stainless steel components are easy to clean and virtually indestructible.

Breville Oracle Espresso Machine

The Breville Oracle resembles a traditional Italian-style espresso machine. It is a hybrid of a semi-automatic and a fully automatic machine. That is, you can use it for both purposes, allowing the machine to grind and brew on its own or just brewing automatically.

Because it works as a fully automated machine, there are no settings to change, making it ideal for beginners. Also suitable for semi-experts, with the semi-automatic operation mode providing a little more control.

The smart technology in the Breville Oracle espresso machines remembers all of your preferences. This makes replicating your most successful drinks far too simple.

It has a dual boiler for faster brews, the excellent Breville build quality we’ve come to expect, and it comes with a 1.5lb coffee grinder and an 84 oz. water reservoir. One of Breville’s most powerful espresso machines.

It also includes a steam wand for making milk-based coffee drinks, rounding out an impressive feature set.

The Oracle can accomplish a great deal for a high price. Quality, on the other hand, can be bought and sold. If you want the absolute best that the Australian company has to offer, the Oracle is the pinnacle of what Breville has to offer right now.

Breville Dual Boiler Espresso Machine

The dual boiler is the key feature of this espresso machine, as implied by the name. This means that one boiler is dedicated to brewing espresso while the other is dedicated to steaming milk, making it ideal for quick and delicious brews. An over-pressure valve (OPV) is included in this Breville espresso machine to ensure that the extraction temperature and pressure are always at the proper levels.

There’s also a hot water outlet where you can preheat your cups or make an Americano (espresso plus hot water). With an auto-start setting, you can preheat the water before brewing right when you need it. There’s no need to wait for the water to reach near-boiling temperatures.

The Breville Dual Boiler espresso machine is not fully automatic due to the lack of a grinder. Aside from that, the water reservoir, at 84 oz., is the same size as the Oracle, and the overall feel and build quality are very similar. It’s a little cheaper because it doesn’t come with a grinder.

Breville Barista Express Espresso Machine

The Express is slightly smaller than the previous two machines, but it includes a grinder. Due to the water tank’s reduced capacity of 67 oz, the dimensions and weight are also reduced.

Overall, it’s a simpler, more hands-on machine, but it’s not lacking in quality.

It includes the standard PID control. A Grid Amount dial allows you to precisely select the amount of grounds you want to brew with. It also has a good steam wand and an integrated conic burr grinder, as do the other Breville espresso machines on this list.

The water pressure can be reduced to 9 bar for a gentler extraction. It’s a small espresso machine, but it has the classic Breville build quality and features you’d expect.

Breville Infuser Espresso Machine

The Breville Infuser may be the machine for you if you want something even smaller. In terms of price, it is a mid-range espresso machine, but it includes many of the features found in more expensive models: There is PID control, a hot water outlet, a 61-ounce water tank, and a steam wand.

In addition, as the name implies, there is a pre-infusion setting to pre-extract the grounds and gradually increase the pressure to the optimum 9 bars.

It has a single and double wall portafilter, so you can get either great coffee or beautiful crema depending on your needs.

This pre-infusion improves the coffee’s overall extraction. Not all espresso machines have this, and given the low price of the Infuser, it is an excellent and welcome addition.

It barely weights 17 lb in total and is very compact due to the lack of a grinder. If you don’t have a lot of counter space in your kitchen, one of the first things you should look at is the Breville Infuser espresso machine.

Even the most discriminating coffee connoisseur would be interested in a few of its qualities for better extraction.

Breville Duo Temp Pro Espresso Machine

The Duo Temp Pro is ideal if you want something even smaller and lighter. It is a Breville espresso machine that weighs only 13.01 lb.

In addition, the Duo Temp Pro is a full inch shorter in both directions than the second smallest Breville espresso machine. The 10″ x 11″ x 13″ dimensions make it easy to fit and store in any kitchen.

The title “Duo Temp” refers to the fact that this machine has two distinct temperatures that may be set to brew coffee or froth milk. This machine’s robust 1600W thermocoil heating technology swiftly and responsively warms water for coffee and milk steaming.

This espresso machine has PID control, stainless steel construction, and a 1 or 2 wall filter basket, enabling you to use freshly ground or pre-ground coffee beans.

It does not, however, include a coffee grinder. Given the model’s pricing, this is a sensible omission. A machine in the Breville line that sits between the most expensive and the most affordable pricing points.

Breville Cafe Roma Espresso Machine

Those looking to make espresso manually on a budget can choose the Breville Cafe Roma. It seems to be distinct from the other espresso machines here examined from the exterior, since it is considerably smaller and has a visible portafilter lever right in the center of the body.

It is a basic model that lacks a grinder but includes a large portafilter and a steam wand. The water tank (40.6 oz.) is large enough to endure for multiple espressos before needing to be replenished. It is not the most powerful Breville machine, but it is completely manual, so you have complete control over the brewing process.

Fans of automation may look elsewhere, but if you are willing to put in the work to fine-tune your brews, this little espresso machine may be of assistance and service to you.

Whether you’re just starting out with espresso or prefer ultimate control over convenience, the Cafe Roma is a low-cost machine with excellent build quality that will welcome you to the world of espresso brewing.

Breville Barista Touch Espresso Machine

The Breville Barista Touch, on the other hand, includes a touch display from which you can select up to five preset coffee recipes to brew with a single press of your finger. Convenience at its finest. Because it is a fully automatic espresso machine, it has a grinder, a steam wand, and a huge water tank (40.6 oz.) for total espresso automation.

If you need to make changes, you may save up to 8 unique drinks in the machine’s memory for quick re-brewing. You won’t have to remember your favorite espressos by hand; instead, let this machine do it for you.

All of the normal Breville espresso machine capabilities are included, as well as a few nice upgrades. ThermoJet heating technology, in instance, can reach the ideal water temperature for brewing in three seconds, which is faster than we could have expected.

The price is towards the top of the Breville range, which is to be expected for such a high-quality and convenient espresso machine.

Conclusion

So there you have it: reviews of the greatest espresso machines from Breville, one of the world’s leading manufacturers. The Australian brand’s line-up is remarkable and capable of meeting every requirement, ranging from some of the most feature-rich and powerful machines, as well as fully automated ones, to the most basic, economical, manual ones.

The Cafe Roma is the greatest machine for newcomers, while the Oracle is the most semi-professional. Between these two extremes, you should have no trouble choosing one that provides everything you want at the right price for your particular budget. Breville has you covered no matter what your needs are.

What Exactly Is Arabica Coffee, and Why Is It So Popular?

You’ve undoubtedly heard the words “Arabica” and “coffee” used interchangeably. It may be found in a variety of places, including grocery store coffee bags and your local café. You’re probably wondering what this name represents. That is just what we shall learn in this essay.

Arabica coffee is simply coffee that has been brewed with a specific kind of coffee bean known as “Arabica.” These beans get their name from the plant that produces them, coffea Arabica. This plant is just one of tens of thousands of coffea genes that make up the plants we call “the coffee plant.” As a result, these plants have various species, much as roses and orange trees have numerous species.

Arabica is the world’s most extensively farmed coffee type, accounting for around 60% of worldwide coffee production. That’s a lot, and the reason is simple: Arabica beans are the most flavorful and sweet of them all, the ones that consistently create the world’s most recognized coffee, the ones most lauded by pros and coffee enthusiasts alike.

The name is a little deceptive. The Arabica coffee plant, in reality, developed spontaneously in Ethiopia. In the 15th century, Arab traders discovered the advantages of coffee and brought the beans to Yemen, which is located on the other side of the Red Sea from Ethiopia.

They then began roasting and brewing it, disseminating it throughout the Arab area and eventually to Europe. The term “Arabica” thus refers to where the coffee was purchased by Europeans rather than where it was grown.

Coffee Types

Before man produced new species, there were many variations of coffee plants in nature. As previously said, Arabica coffee is only one of them, albeit the most popular. It accounts for a sizable amount of coffee output, and the last cup of coffee you had was almost certainly made with Arabica beans.

Other coffee varietals make for the remaining 40% of world output. After Arabica coffee, Robusta coffee is the most popular. It was previously known as coffea Canephora and was exclusively found in western and central Sub-Saharan Africa.

It is presently grown in countries ranging from Brazil to Kenya to Vietnam. These two coffee varietals, along with Arabica coffee, account for around 98 percent of all coffee beans sold globally.

The remaining 2% is made up primarily of two other species: coffea Stenophylla and coffea Liberica. Stenophylla is found predominantly on the West African coast, in more humid and wet areas, whereas Liberica originated in West Africa but is now grown all over the world.

Indonesia and the Philippines are the principal producers of Liberica coffee. Both of these species, however, are insignificant in contrast to Robusta and Arabica coffee.

Arabica vs Robusta

Why was there such a focus on Robusta and Arabica in the coffee world? Given the variety of coffee species, the question begs to be posed.

The main reason for this is because both taste better than the vast majority of other coffee species. Both are capable of making good coffee, with Arabica coffee gaining the most praise. Arabica coffee is sweeter and contains more acidity, as well as a wider range of flavors in the cup.

A coffee made from Arabica beans contains a variety of delicate flavors. When opposed to Robusta, Arabica does not have a strong body and has a lower caffeine content (about half). As a result, it is sweet and not overbearing, making it suitable for the majority of drinkers.

Robusta has certain benefits as well. It is less difficult to farm since it is more disease resistant and adaptable to a variety of climates. Arabica coffee’s growth zone is rather limited, but Robusta coffee is more tolerant of drier and hotter temperatures.

Furthermore, Robusta has stronger body, which is widely desired by espresso connoisseurs, and it contains more caffeine. Robusta coffee may be flavorless, but it is a great coffee to consume when you want a strong, heavy cup of coffee.

Where does it grow?

The Arabica coffee plant despises cold and dry weather. It needs high humidity and warm temperatures to flourish. Cold nights might be disastrous for the plant.

It’s no wonder, therefore, that Arabica coffee is grown in subtropical locations all over the world, particularly on hills and mountain slopes where the temperature is never too high but also not too cold that the plant suffers from icing.

Consider elevations of 1900 feet or higher above sea level. Arabica coffee is cultivated almost anywhere there is a hot climate and some highlands. Colombia, Brazil, Central America as a whole, Peru, Kenya, Tanzania, Ethiopia, India, Indonesia, and a slew of tiny tropical islands provide a perfect environment for the coffea Arabica species to grow.

The aforementioned nations produce the vast majority of Arabica coffee, which all have subtropical climates and a big amount of cultivable areas that are not on plains.

When those two parameters are satisfied, there is a strong likelihood that outstanding Arabica coffee will be produced.

Popularity

Arabica coffee has become synonymous with “good coffee,” which is only partially true. Not all Arabica beans are excellent, and hence not every Arabica coffee made with them. A perfect cup of coffee is based on a number of factors, and merely selecting Arabica beans will not guarantee that you will have a superb cup of coffee.

Even if you use the best Arabica coffee beans available, if you brew it incorrectly, you will have a bad cup of coffee.

Arabica beans have more sugars, superior acidity, deeper flavors, and a lower caffeine content than other coffee beans, making them the best coffee beans you can buy (with ease). Because of these properties, Arabica coffee has become extremely popular.

At coffee auctions across the world, Arabica beans consistently get the highest points: on a scale of 0 to 100, it is not uncommon to see Arabica coffee scored over 80 or 90. Robusta beans are rarely given such high marks.

Of course, Arabica coffee is more costly since it is so much valued and adored. Arabica coffee mixes are more expensive than Robusta coffee blends, similar to how good wines might cost hundreds of dollars more than table wines. Quality, of course, has a cost.

Health benefits

Arabica coffee is not only tasty, but it also has various health benefits worth mentioning:

  • It’s loaded in antioxidants.
  • Caffeine concentration is high, but not as high as in Robusta, making it perfect for individuals who want to keep awake but are concerned about sleeping at night.
  • It contains extremely little calories.
  • Minerals such as niacin, magnesium, riboflavin, manganese, and potassium are abundant.
  • Coffee grinds may be used to produce a great skin scrub (ok, this is true for any type of beans).
  • When consumed in moderation, •Arabica coffee has been shown to be good to the heart and capable of avoiding cardiovascular disease.
Design a site like this with WordPress.com
Get started